A practical guide to evaluating 3D Gaussian Splatting for your next production
There’s always another deadline. Another delivery. Another project that needs your attention before you can explore something new. For teams interested in 3D Gaussian Splatting (3DGS), testing can easily become something they’ll get to “when things slow down.”
But evaluating a new workflow during an active production leaves less room to learn, troubleshoot, and make informed decisions. Setting aside time earlier helps you understand where the technology fits and what your team needs to use it. The starting point can be simple: one environment, one production question, and a defined time to explore it.
Start with a question you need answered
A useful test begins with a specific production need. “Let’s try Gaussian Splatting” is a starting point, but it leaves the scope wide open. Give the test a question:
- Could we use a captured location as a background for this shot?
- Does this environment hold up through our planned camera move?
- Can our team bring a 3DGS asset into our Unreal Engine workflow?
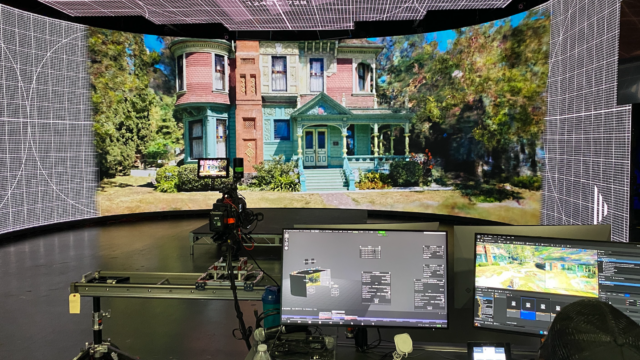
- What would it take to use this environment on an LED volume?
A clear question helps you choose the right asset, involve the right people, and recognize when the test has delivered enough information.
Define what success looks like
Before opening the software, agree on what the result needs to achieve. An environment used for previs may have different requirements from one appearing in a final shot. A background viewed from a fixed position needs a different evaluation from an environment explored through a moving camera.
Focus on five areas:
- Visual quality: Does the asset hold up at the intended camera distance, framing, and output resolution?
- Camera movement: Do the required angles reveal gaps, distracting artifacts, or areas that need more work?
- Performance: Does the scene meet your playback or rendering requirements on the hardware you expect to use?
- Workflow fit: Can your team import, position, manage, and output the asset within the planned pipeline?
- Time and effort: How much preparation and troubleshooting does the process require?
These criteria give everyone a shared basis for reviewing the result.
Keep the first test manageable
Choose one environment and one short camera move. Include a challenge that matters to the intended use, such as fine detail, foreground objects, or a particular viewing angle. The goal is to keep the scope small while preserving the conditions you need to evaluate.
For example, a test brief might read:
Evaluate whether a captured exterior can support a ten-second background shot in Unreal Engine, using our target workstation and planned camera movement.
If you’re evaluating the capture process, include capture preparation and processing time. If you’re evaluating asset integration, starting with an existing asset can help you focus on that part of the workflow.
Give testing a place on the calendar
Testing needs an owner, a time allocation, and a review date. Assign someone to coordinate the work and record the findings. Reserve time for setup, evaluation, and discussion. Depending on the question, that review might involve an artist, a technical lead, and a producer.
Schedule it early enough for the findings to influence decisions about locations, assets, equipment, or production time. A defined endpoint also helps prevent the test from becoming an open-ended exploration. Finish with what you’ve learned and identify any questions that need a separate follow-up.
Follow the asset through the workflow
A useful evaluation follows the asset through the steps your production will require. That could include sourcing or capturing an environment, preparing the data, bringing it into Unreal Engine with Volinga, setting up the shot, and reviewing the intended output.
Use representative hardware, camera settings, and delivery conditions wherever possible. For an LED volume application, plan a stage evaluation before committing to production use. Record where the process is straightforward and where it needs additional work. Those details help you estimate the resources a future project will require.
Turn the findings into a decision
At the end of the test, create a short record of:
- What you tested and under which conditions.
- What worked and where limitations appeared.
- How much time the process took.
- What you recommend doing next.
You might approve the workflow for a specific application, schedule another focused test, or choose a different approach for the project. Discovering a limitation early is valuable. It gives the team time to adjust before that limitation affects a delivery.
Build on what you learn
Save your test assets, settings, example outputs, and notes somewhere the team can find them. Together, they become a useful reference for future projects. As production needs and tools change, revisit the tests that matter to your work.
Making testing a priority starts with giving it a clear purpose and a manageable place in the schedule. Choose one environment, ask one production question, and use the result to guide your next step.
”Testing new tools and processes will help you broaden your horizon and discover new workflows that you didn’t even contemplate at first, thus being able to open a new path previously unknown.”
Marcos García, 3D artist, Volinga